Saturday, June 21, 2014

Pinterest inspiration

I spotted this layout in pinterest and thought 'I have those stamps!' I searched high and low and realised that I have NO grey colours of card stock. I searched my entire stash and found two flimsy grey sheets that I purchased years ago and off I went. *note to self-order grey card stock*

The card on pinterest was in these first colours. I used Memento tuxedo black ink, and Stampin' up! basic grey, real red (and daffodil delight in the second two). They had made theirs using the spotty folder with the bumps facing down but I wasnt sure and made one each way...bumps down and bumps up.


And then I thought, "I'm really loving yellow and grey right now, lets pull out some yellow ink and card stock!" These second two are the result of that. I quite like them and am now contemplating whether I can somehow add some kind of aqua/turquoise shade to it? Also with these two, one has black bling and the other, pearl bling. Any preference?


Then I typed a list of all my Stampin' up! stamp sets...looked up and realised it was 4am. Whoops! Must buy a clock for my craft room lol.

Thursday, June 19, 2014

Brayer class at Odette's

On Monday night, I went to a stampin' up! class at Odette's house (lemme know if you need her online shop details). We were working on brayer techniques and since I had had limited success (to put it mildly) with using brayers, I thought I'd take a class. It was such a fun night out and I got some great ideas of different ways you can use your brayer. After some practicing, we moved on to making cards. We made the hardest card first but I've uploaded them 'easiest to hardest'.

This first card is brayering a single layer of colour onto a card (the purple square in the middle started out white) then stamping over it. Perfect plum and Elegant eggplant:


This card, I really liked. The circle was masked off with a post-it note and we brayered the fading colour on. There was a technique (one, two, THREE) to it which I didnt quite master (you can see a darker yellow line above my circle) but I am sure I will improve with practice! Also a great way to use up some of my less favourite colours (as you will see in a minute).


This card was SO cool to make. We brayered on layers of ink (masking off the moon first, of course) and used ripped paper to create the island in the middle (ripped a hole on it, lay it on the card and brayered dark ink into the negative space the rip created). I will certainly be making this one again. When I went to craft group today and they asked what we did at class, this card was the one they wanted to try:


Last night, I pulled out some kiwi kiss (not my favourite colour) and attempted to re-create one of the cards.

It was then that I discovered that this card looks WEIRD with flowers floating in the middle of no-where. Odette's stamp actually  had grass at the bottom but mine were sitting suspended. I fixed it by adding ribbon. And though to myself that I shouldnt have been so lazy as to not properly line up the top of those flowers but men...maybe some of them are flying off in the wind! :P And then I put the greeting on crooked and had to stamp it and stick it on to cover it up lol:


Take two:


Card count: 135


Monday, June 16, 2014

Crochet hat

I made a beanie this weekend. Really a very simple pattern. It came from the  crochet crowd on YouTube (I would link but I am on my phone typing this-sorry). What I really like about the crochet crowd is that they have both written instructions and videos of the same pattern. It helps people like me a lot! I was taught to crochet but not how to read a crochet pattern so I make it using the video then go to the pattern and read it so I learn the shorthand. Plus with crochet there are different terms for stitches, depending where you live! Most of this is done with a stitch called a treble. Unless you live in America and then it is mostly with a stitch called double crochet (dc). So I learn a lot using that particular YouTube subscription!

Kaszazz Asian kit

So I bought a Kaszazz kit last week. I chose this kit because it isn't my normal genre and I was curious about whether I would like it/use it. It is a good way to 'test the waters' with a stamp.

In a Kaszazz kit, all the phrases are pre-stamped and all the pictures are too. They come with a pamphlet of photos you can copy (which I did) but no instructions or measurements etc...

In this kit were two pages of stamped images (computer printed), a pack of 30 pink shades of paper (really useful), ribbon, pearl embellishments and three sheets of double sided 12x12 pattern paper. I spent last night cutting out bits so that tonight I could play and though I made ten cards, there are plenty more bits I can use.

I think all these images are available as stamps in the Kaszazz catalogue. I already own the birds/bird cage set and after making these, I see umbrellas/fans in my near future!


Sunday, June 15, 2014

So Wednesday craft group rolled around and we made the cards I had chosen. I managed to make 14 cards which is a fairly epic effort. We were aided in the fact that everyone helped out, I didnt have to poke out all the holes in these cards (around the word 'bliss') and I didnt have to run the phrase through the big shot either. I kinda wish I had, as some of them arent very well lined up/central but hey, that's ok-they will get used! As you can see, I made great use of my friend Maree's border punches along the bottoms lol.

I think the only differences from the post before, are the colours. I used crumb cake (same as previous blog), very vanilla (same as previous blog post), pumpkin pie, raspberry ripple, bermuda bay and rose red.


 '

This one got dropped into the middle of the other cards (sorry about that). I believe (?) I chose soft suede, strawberry crush and coastal cabana (I might change that to Bermuda bay next time).


Saturday, June 14, 2014

lots more cards!

This first card REALLY annoys me because I didnt put it on centered and I couldnt peel it off again lol. It will probably just get used as a notecard to my sister.


Apologies for these next ones being in their little plastic bags already! I forgot to take photos before I put them away. I was on card teaching at class on Wednesday, so on Monday night I visited my friend Sheryl and trialed out this design (which I grabbed of pinterest) to check I had everything I needed and work out any kinks. Everything here is stampin' up except the die around the word 'bliss.' I bought the die at the craft fare and cant recall which brand it is, but I have used it A LOT since buying it. The stamp set is called 'bliss' though I dont think it is for sale anymore. Papers: very vanilla, midnight muse, crumb cake, elegant eggplant, raspberry ripple.


This card below was also on pinterest. My husband's cousin knew I had the stamps and punch for this card and suggested the pin so I went ahead and made it on Tuesday night. 


Thursday, June 5, 2014

101 cards so far this year!

Well I've been making a lot of cards lately!

These first three were a Kaszazz class at Janene's house.      


This pink card is one I really dislike! In fact the moment I finished it, I gave it to someone else so I didnt have to look at it or give it to someone else lol. I actually really like the background paper (that I created using popcorn chalk ink stamped onto glossy card stock then inked over with a pink chalk ink).


This card is another of that series I did a few months ago. I still have a few of these stamped and waiting around but I am a bit tired of this genre lol. I used a tiny bit of gold foil on the lamps, they shimmer!


A notecard:


I dont like this card at all and am seriously contemplating throwing it out lol.


Judi (Ryan's cousin) found this button card on pinterest. She made it without the white layer and stamped her birthday greeting onto the red, but I felt it didnt stand out so used a white layer. The benefit of being the second person to make it lol.


This wedding card opens 1/3  of the way across with the wedding dress half stuck onto the flap. The tux is on the bigger flap. I embossed underneath it as I felt the card was too plain. Loved the tux but not the dress so will play around with it next time I try this card.


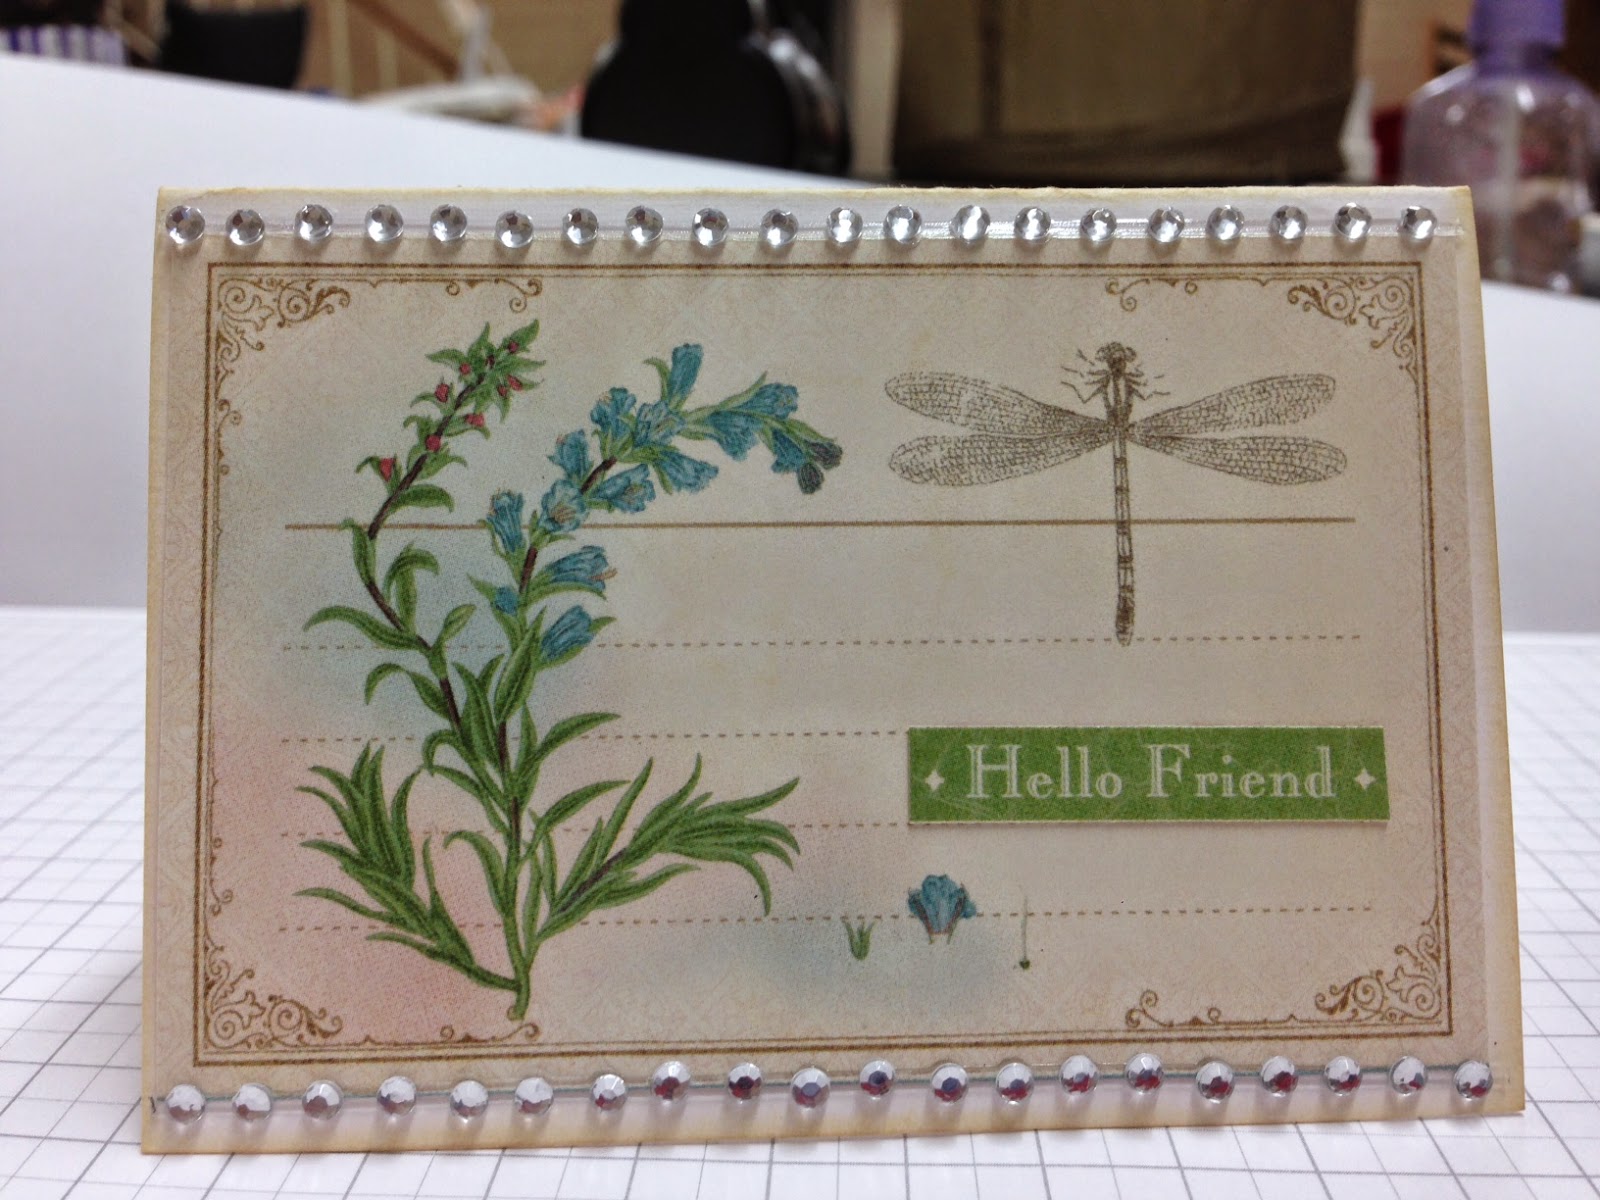
This series of floral/bird cards and notecards was from a class I took at the craft fare in May. We made two tags and two notecards and the rest I made at home. They are really simple cards, just cut and mount things that are already pre-printed on paper.


This was a Kaszazz free card from the same craft show. Simple stamp, colour (using watercolour pencils) and add a layer of pink shimmer around the outside. The pink is a foil. You run a glue pen around it all then wait until it is tacky and stick foil down onto the card. Where the glue is, it sticks and adds a nice touch to a card.


Another free card, this time from 'Close to the heart' which is another craft supplier. Stampin' up! Kaszazz and Clost to the heart are three tupperware-style craft suppliers. They have classes, workshops and online sales. If you need any contacts, let me know!


This card was jus tbecause I had left overs laying on my desk lol:


This is the card that created the left overs lol:


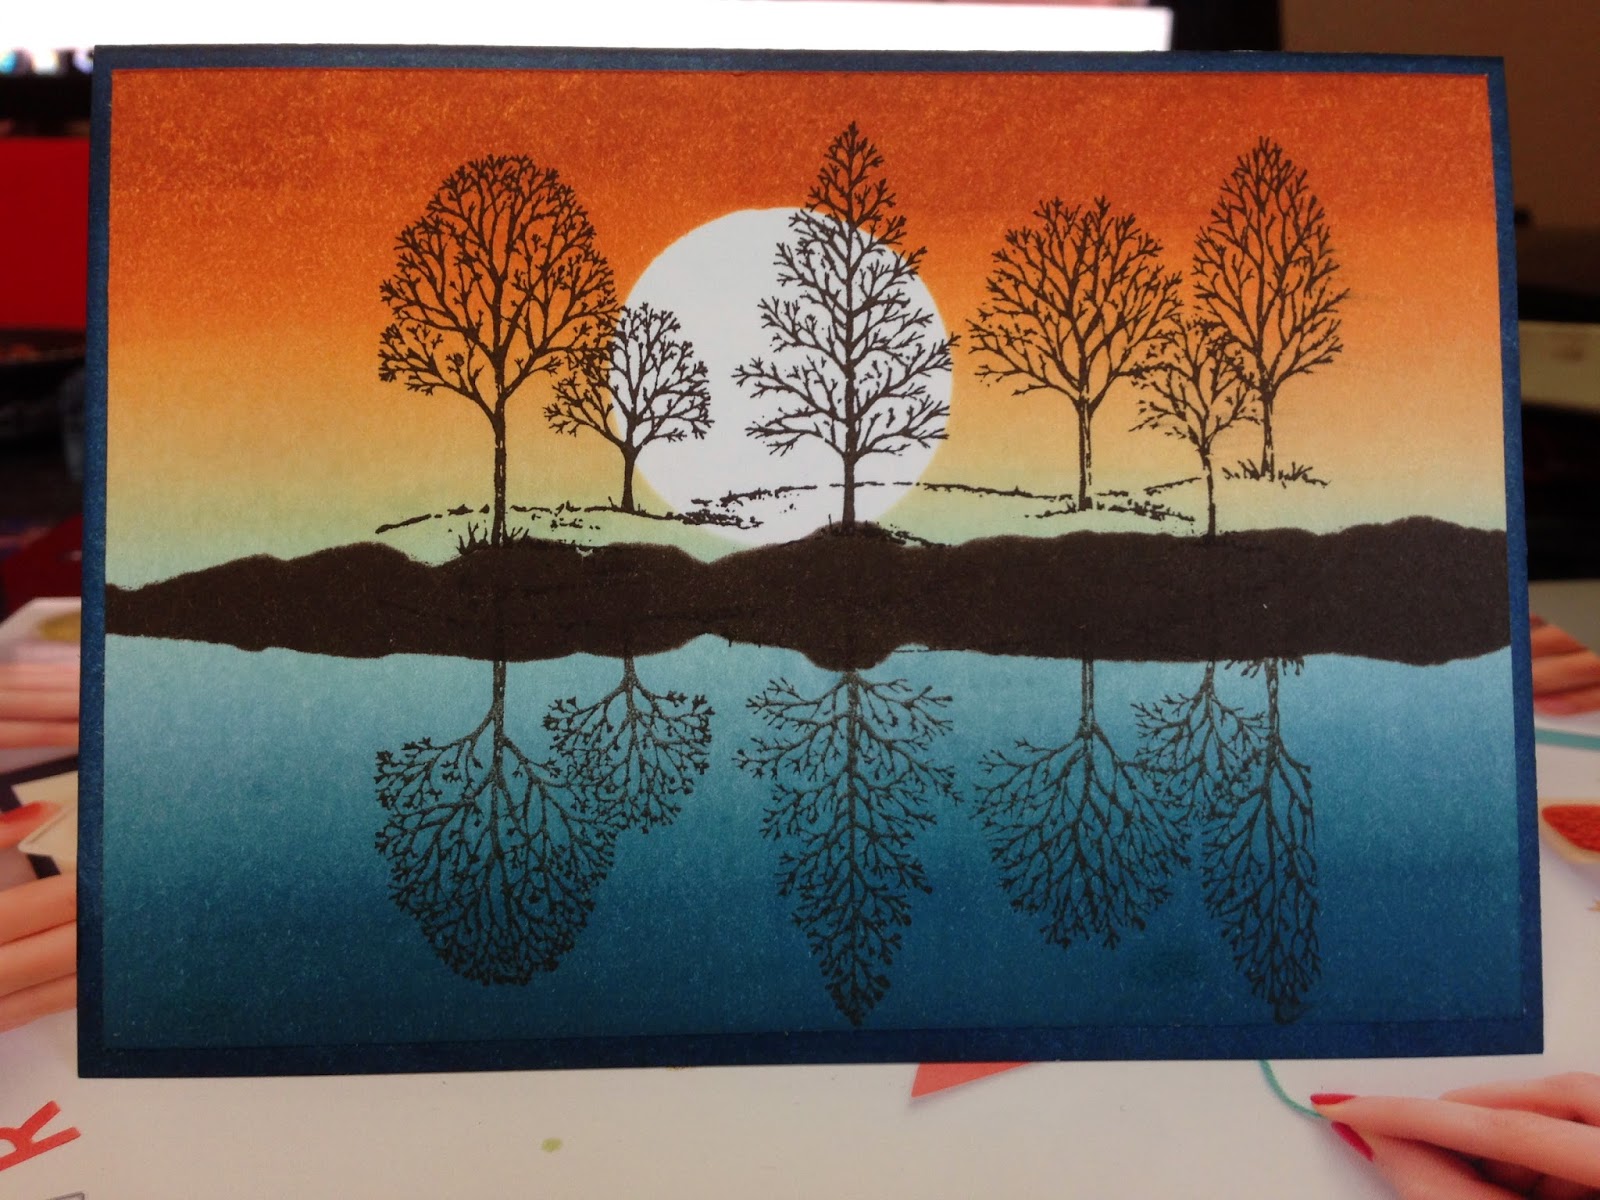
I went to a Kaszazz mega demo day and discovered this card technique. This is the one I made at the mega demo...but as you'll see, I've made it a few more times lol.


Remember this card from teh post before? I decided it did need something so I added this love circle.


I gave this one to my friend Maree for her birthday (which is tomorrow):


Lets see if I can get another 100 made this year!