Tuesday, December 31, 2013

A few cards that I made towards the end of the year. The Christmas ones were really simple but quite pretty...the paper sparkled. All ended up going to my friend Maile so she can send them to people.


Sunday, November 17, 2013

Saturday, November 9, 2013

Cards...after a long break!

These first two cards, I call 'limited supplies to make cards' aka I was at Sheryl's and didn't take much with me!


Below are my first attempts at washi based Christmas cards!


Wednesday, June 26, 2013

60

Half way through the year and I am only at 60 cards made which is not too great! Time to put in some more effort.

These cards are made by stamping french script onto watercolour cardstock, spritzing with water and washing with Distress Stains. I then heat dried it an embossed the flowers. I've made it in a few colours and one isnt pictured as my niece used it to write a poem inside.


This card was made at a stampin' up! card making afternoon at my friend Tash's house. We made three cards though I am somehow missing the third card to show you. The horizontal red was run through the big shot. The flowers were embossed then embossed again on red card (black embossing powder) then hand cut and raised using dimensionals.  A very simple yet pretty card.

This was also from the same card making demonstration. I've made this card before so it wasn't anything too difficult for me!

This one was to try out my new background stamp. I really want to emboss it soon! I will probably add something to this card but no idea what (as yet).


I cant decide which way I should use this card lol. I used my scoring plate to create the lines, then washed my stamp with two different colours. I quite like it for a flat card that is easy to post.


I masked this card and stamped it in pink ink. Then used a sponge to move the ink into the white spaces, thus giving the flowers a lighter (yet toned) effect. A few diamantes and a ribbon and all done!


Sunday, May 12, 2013

Cards 46-50

Cards 46 and 47: These cards used paper smooches geographic stamp set. The stamp itself is a bit faulty in that no matter what I do, I can't get it to stamp properly on the right hand side of the stamp. Luckily for me, this design meant I could cut off the faulty side. I coloured it in using Kopic alcohol markers. The two phrase stamps are also from Paper Smooches. I use that set a LOT these days, I love it! I like that it has an informal feel to cards and for the most part, these cards are going to friends.


Card 48 and 49: I copied this idea off pinterest and they are just 'ok'. I think next time I'll sponge on a second colour for interest, perhaps a grey. I also don't like the dragonfly and think I might cut one out and add it on 3-d...though the idea was to make a flat card for posting lol. They arent so horrible that I can't use them but I don't love them.


Card 50: I made this card some time ago. I used the doilies die from Stampin' up! and someone gave me a fantastic hint which I've used ever since. I put a layer of baking paper in between the die and the card stock and it makes it so much easier to pop out the negative space and clean up the die. I now use that technique on all my complex dies. Tonight I found this card again and knew I wanted SOMETHING on the bottom then recalled I had found some (years old) rub on greetings so I added it to the front. Rub on's are much easier when done with a bone scorer than the ice-block stick they give you with them! It may not be perfect but at least now it is useable!


Saturday, May 11, 2013

Made in 2012


I was just looking through my cards on my blog and couldnt find these two cards, which I made my sisters (identical twins) for their 40th birthdays last year. The construction of these cards is quite simple, the decorating is rather more painful as you must measure quite precisely! I liked how the turned out anyway!

Catch up cards 40-45

I've made a few card lately...here are some really bad photos for you lol.

This first card opens on a top fold and is black textured card. The card stock on top is shimmery. Whenever you work on shimmer card stock, you have to do a test first as the tones will be muted to some extent. I think I used basic grey (SU) and Red riding hood (SU) inks for this card. The ribbon was in a bulk pack of colours from spotlight. I made four copies of this card, one 'happy anniversary', two 'my friend' and one 'happy mother's day'. All stamps were Stampin' up!


I've shown you this card before. This time I used googly eyes for the owls (it was very cute) that I picked up in a mixed sized bag from The Reject Shop.


I was trying out my new chevron cutting plates in the big shot and made this card. The cutting plate has two different sizes so I created a thick and thin combination and attached it to the front of the card, trimmed both sides, rounded the tops and added a happy birthday banner. To cut the banner edge evenly, you can cut right up the middle of the strip, then from each corner, into that centre cut. The happy birthday stamp is from Paper Smooches and is my current favourite greeting set. If I was making it again, I'd be sure to move it further to the right so it wasn't covered by the button. The button came in a big jar from spotlight and bakers twine was purchased in N.Z. When I was finished, it looked...not complete? So I punched holes around the top of the card and quite like how it turned out. Note: if you want to post a card like this, the card has to be a slight bit skinnier or the banner has to stop right at the edge of the card (your choice).


Monday, May 6, 2013

34


This is card number 34 which I made on Feb 8th...but kept hidden because it was Bianca's birthday card and her birthday was yesterday according to this scheduled post lol. Emma actually made the three tiers of the shopping bag, I just put the gems, tissue and handle on it. All the rest I made myself though. 

Wednesday, February 20, 2013

More cards lol

The idea for these first two came from Stamptv (youtube) and an autumn stamp/ribbon/paper set they sent me.


Saw this idea on pinterest and tried it and I have to say, I like it! I might make the background more dull next time and perhaps try other colours.


The two cards below, I made using water colour paper. I masked the sides then washed them with distress stains, sprayed them with water and let the colours merge a little. I dried them with a heat gun, embossed a flower on top and added a bow. They have no greeting so can be used for whatever people like.


Saturday, February 9, 2013

Cards again lol.

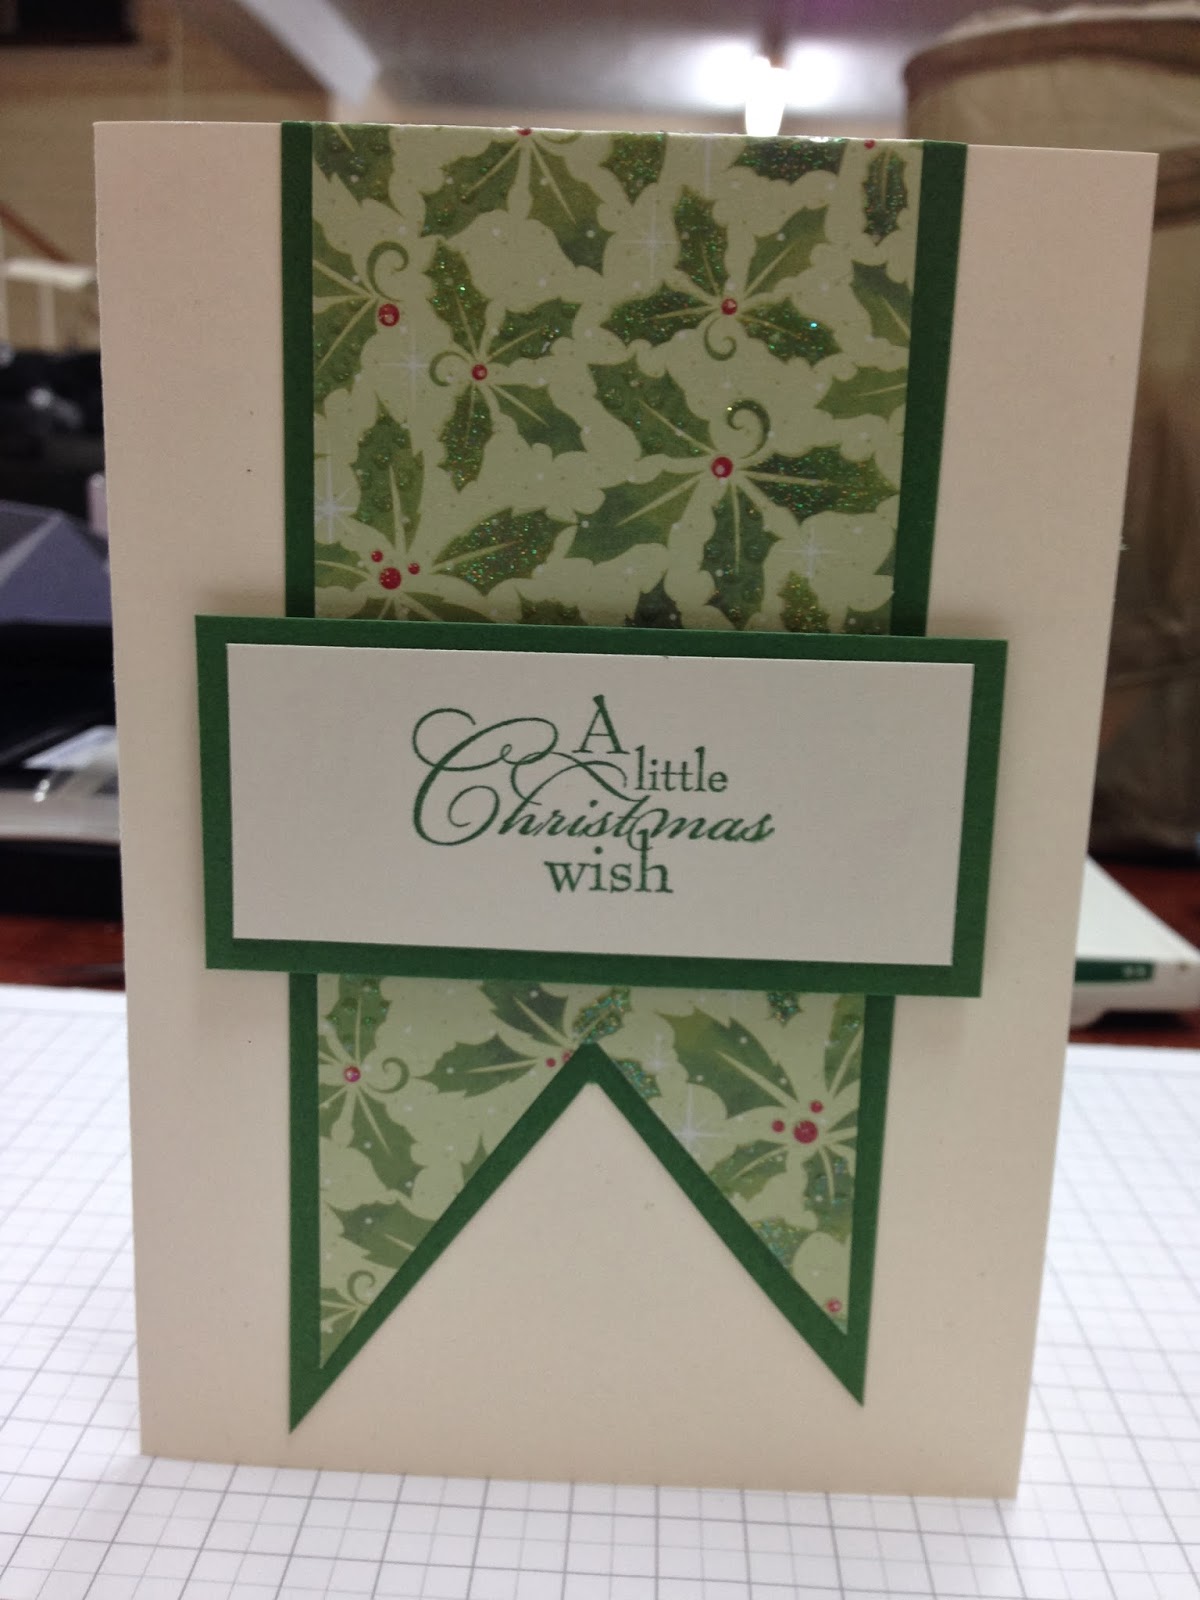
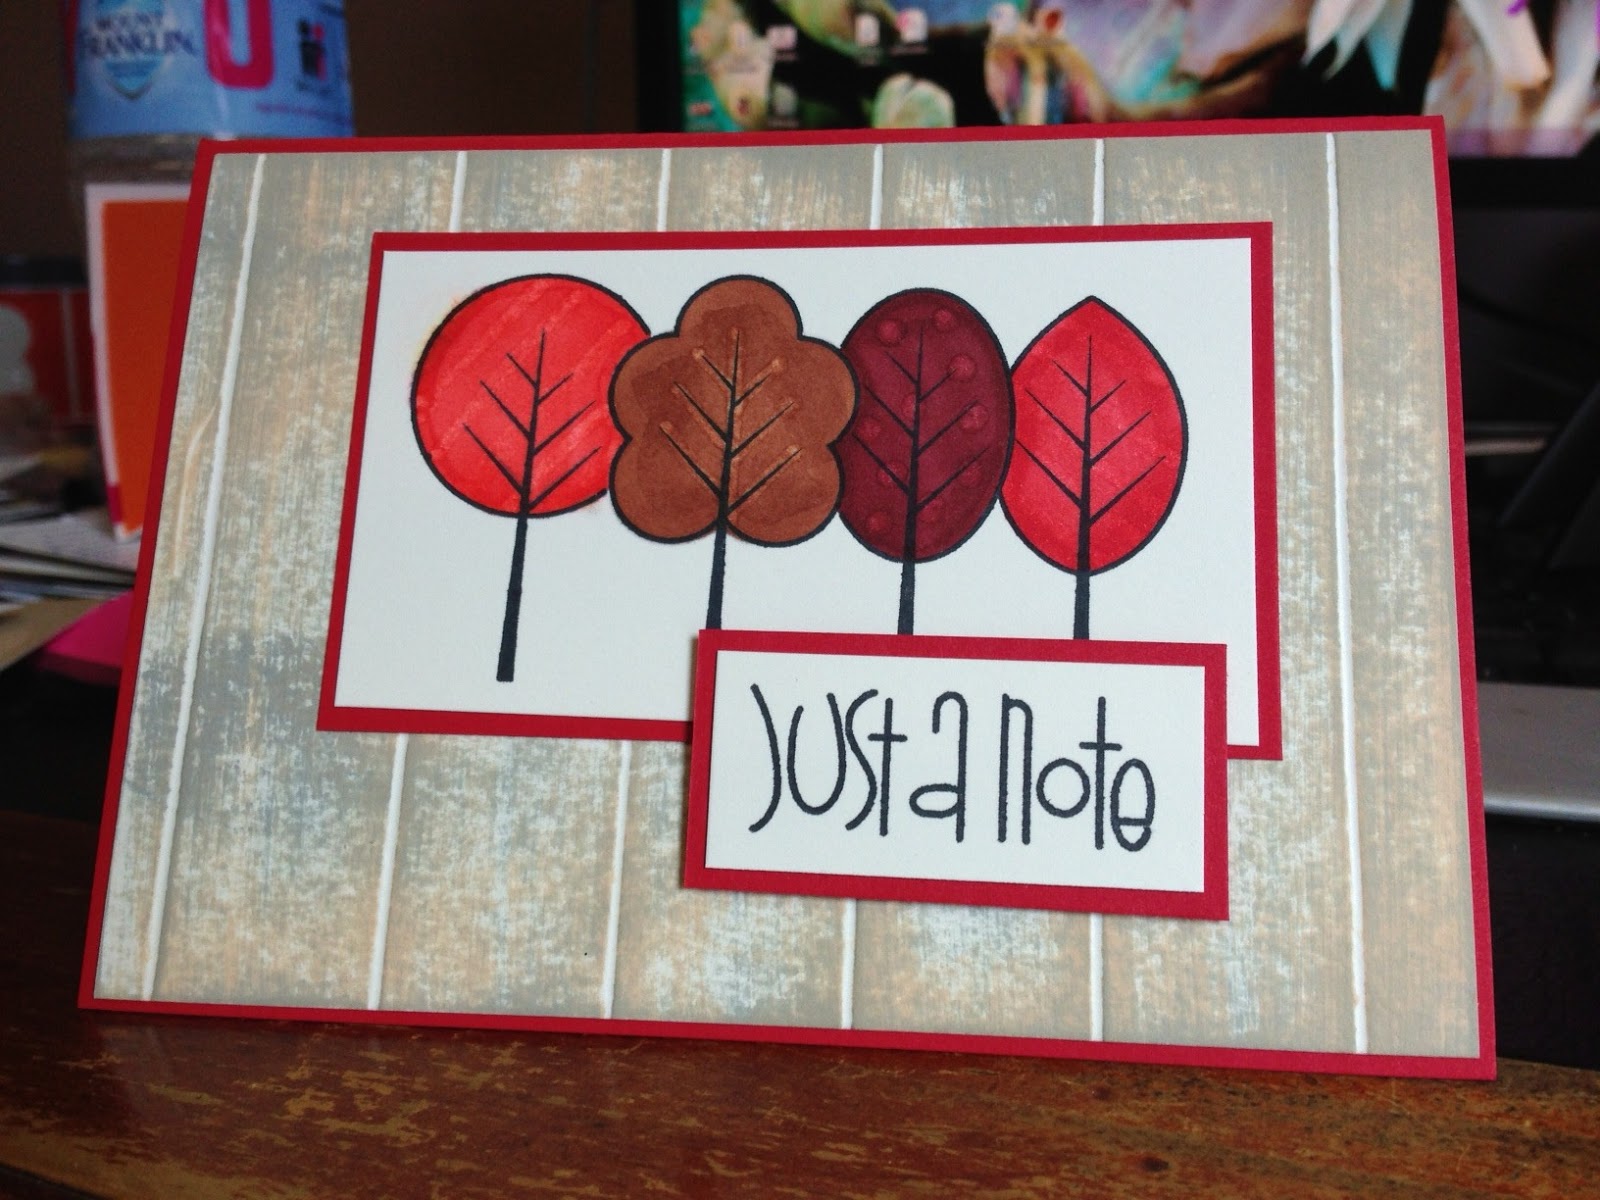
27 and 38: These two cards were made because I wanted to thank my sister  Jan for a stack of paper she gave me for Christmas. She doesn't usually buy me gifts so it was a nice surprise. She gave me a book of patterned paper and I cut a slice of a few sheets and stuck them together to create this diagonal pattern. Each was cut to one inch and then another layered behind it, meaning each layer was a half inch wide. Once they were all together, I was able to cut it in half and get two cards from one lot of cutting-now that's what I like to do! The bottom of the two is for my sister, the top one I made second and is just to show you want a difference a background colour can make to a card. Had it not have been 2am, I might have done more to the top design...I dont like how it turned out but oddly I like the brown one!


Card 29: Ok the simple truth is that I went to return the bird stamp (see previous card post) and saw this stamp, I just couldn't walk out without it! I coloured it quickly with copic markers and slapped it on a card that just happened to co-ordinate and be laying on my desk lol. I could have decorated it more but I wanted the bunnies to be the feature and I kinda like it's simplicity.


Cards 30-33: All were made with Stampin' up! ink because I didnt need any real permanency with them, the werent being embossed or getting wet.

This is the same as card 21 I made. Well, not identical as it has a different ribbon and the butterfly in a different place but close enough to 'the same' as I used all the same inks and techniques. When I do inking/sponging techniques like this, I really like to throw in one colour that doesnt 'go' as well. It makes for a beautiful effect. This one had two shades of yellow, so I threw in a hint of pink and it came out almost like a sunset!


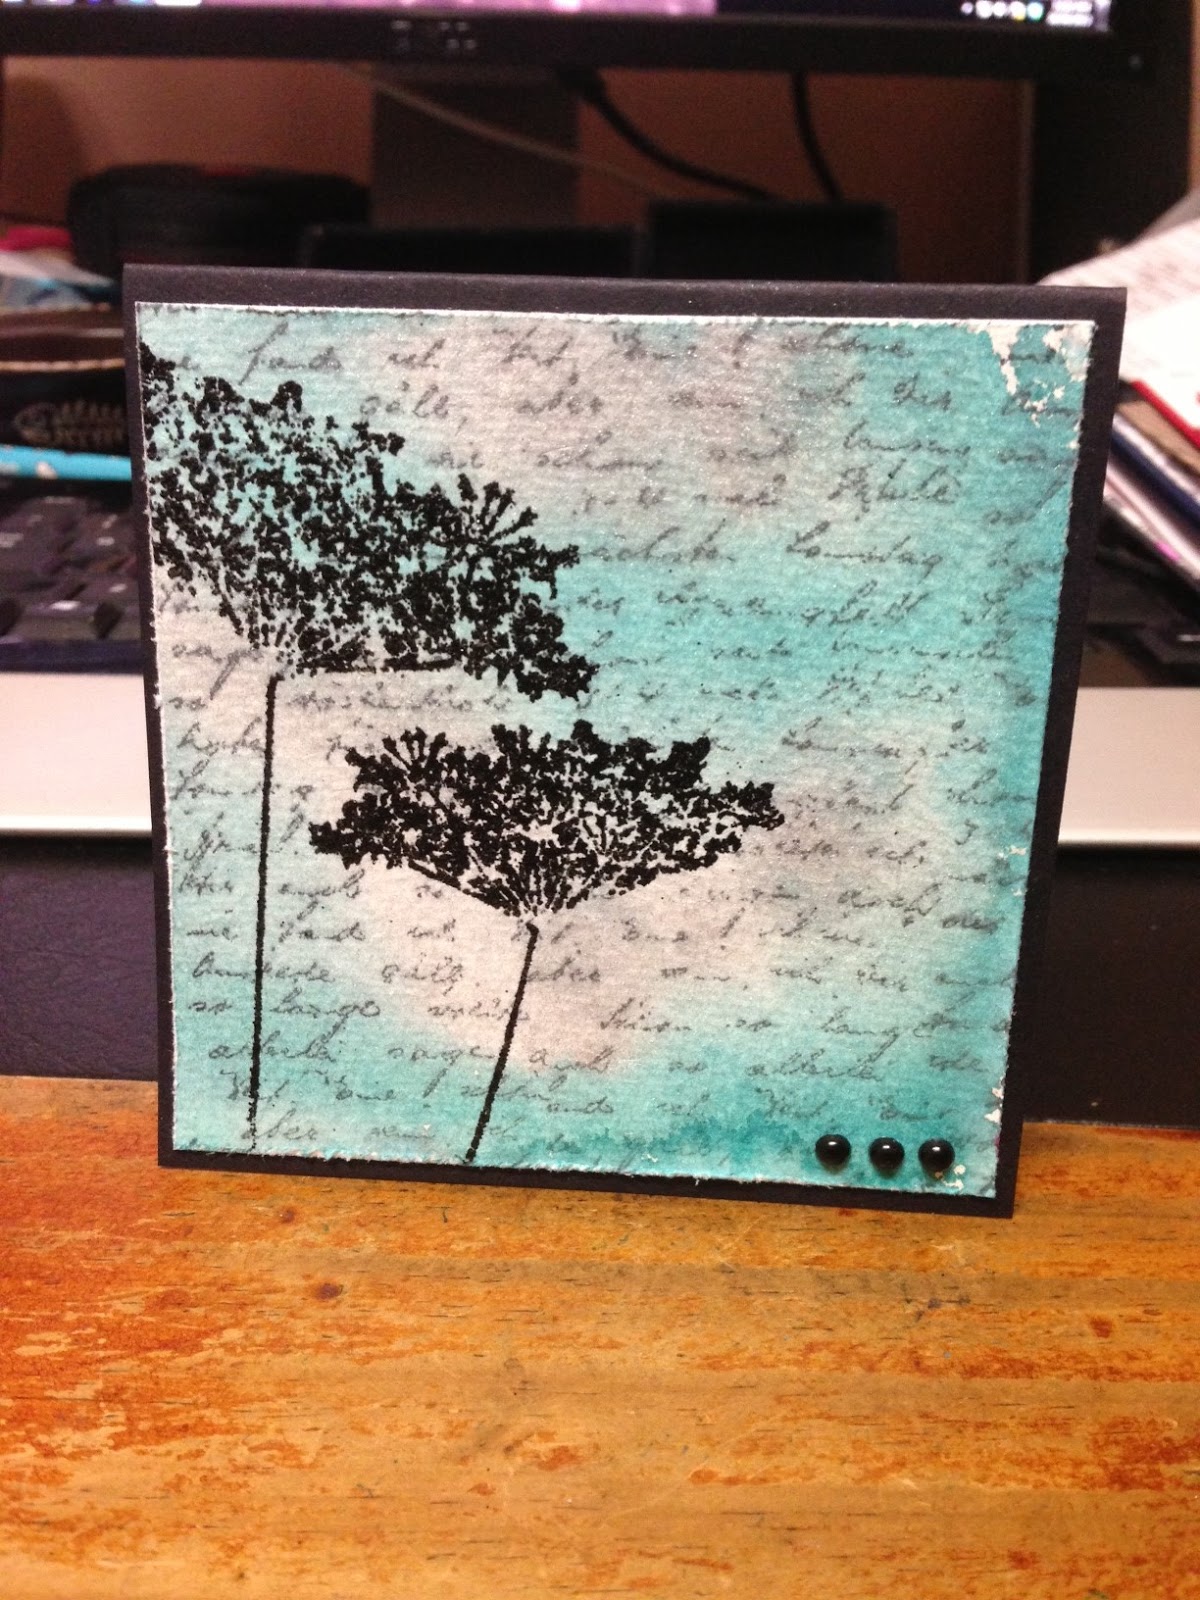
I put the card below on facebook and it seemed reasonably popular! I started by cutting out a frame shape using nestabilities and my bigshot machine. Normally you would throw out the scrap edge and put the shape on a card (and I will in future, I kept them all), but this time I used the frame that was created when I removed the center cut out. I taped the frame to the card so it didnt move and used four inkpads. The first I used was a light yellow (so saffron by Stampin' up!) which I sponged onto the outside frame and never actually sponged onto the card because I intended that the colour got dragged off the frame and onto the card when I added the light grey. This yellow was my 'unexpected colour' and made a sensational difference to the end result. Second was a very light grey ink which I dragged from the outside, directly into the centre of the card using sponge. Then Buckaroo (medium to light) blue was added to the card using a sponge and a swirling motion. Finally I added 'not quite navy' ink to a few places (do you see it top right, that bit of darker blue-you really can't add too much of an intense colour or you lose the subtle marble look). Then I simply chose a pretty stamp and greeting, stamped them on and removed the frame that was keeping the outside white. It is always a bit of a shock when you remove the outside frame because it is SO much darker than you imagine it will be. Aside from that, I rounded the right hand corners, added bakers twine and put it on a layer of co-ordinating blue card stock.


Then I got to thinking, what other frame shapes do I have for my bigshot? Oh I have nestabilities scallop ovals! Voila-next card created!


And finally I decided to make a square card which meant I needed a more even-sided die. I used a nestabilities one (that I forget the name of and am too lazy to go find lol). It needed a different flower stamp because of it's shape so I went with a GORGEOUS set I got from Gina. K designs/stamptv. Adding a quick knot and rounding corners and the card was done!


I'm having great fun in my craft room lately, but the housework is suffering a little lol.

Oh and I've made one more but it's a scheduled post for after someone special's birthday!