Tuesday, May 19, 2020

Craft retreat

This past weekend, with restrictions lifting, I went away to a craft retreat with 7 other women. We had a wonderful time! We had to do a heap of social distancing...no hugs, not sharing craft supplies, our own plates, bowls, cutlery, tea towels, hand towels, desks spaced apart etc...but it was well worth it. I dont feel I made a HEAP of work, given I was there Friday 4pm-Sunday 2pm!

So lets get started. The vast majority of these are pinterest inspired, hopefully I can find the original people so I can give you a name to look up.

Inspired by Stampin' always with Dori. She had a square card, I wanted rectangular for standard postage. The cat is out of Grace's Garden. They were coloured with alcohol markers and each has two mini-dimensionals behind it.


So I have been making some cards using 6x6 DSP. When I do this, I start by cutting one side to 10cm so I have a wide strip left. This is the kind of card that I use this strip for. However in this case, I didnt start with 6x6 lol. I usually cut another shape from the paper and raise a few bits up for a bit more lift. I have a couple of other samples of this but I didnt add them to this post...maybe my next post?


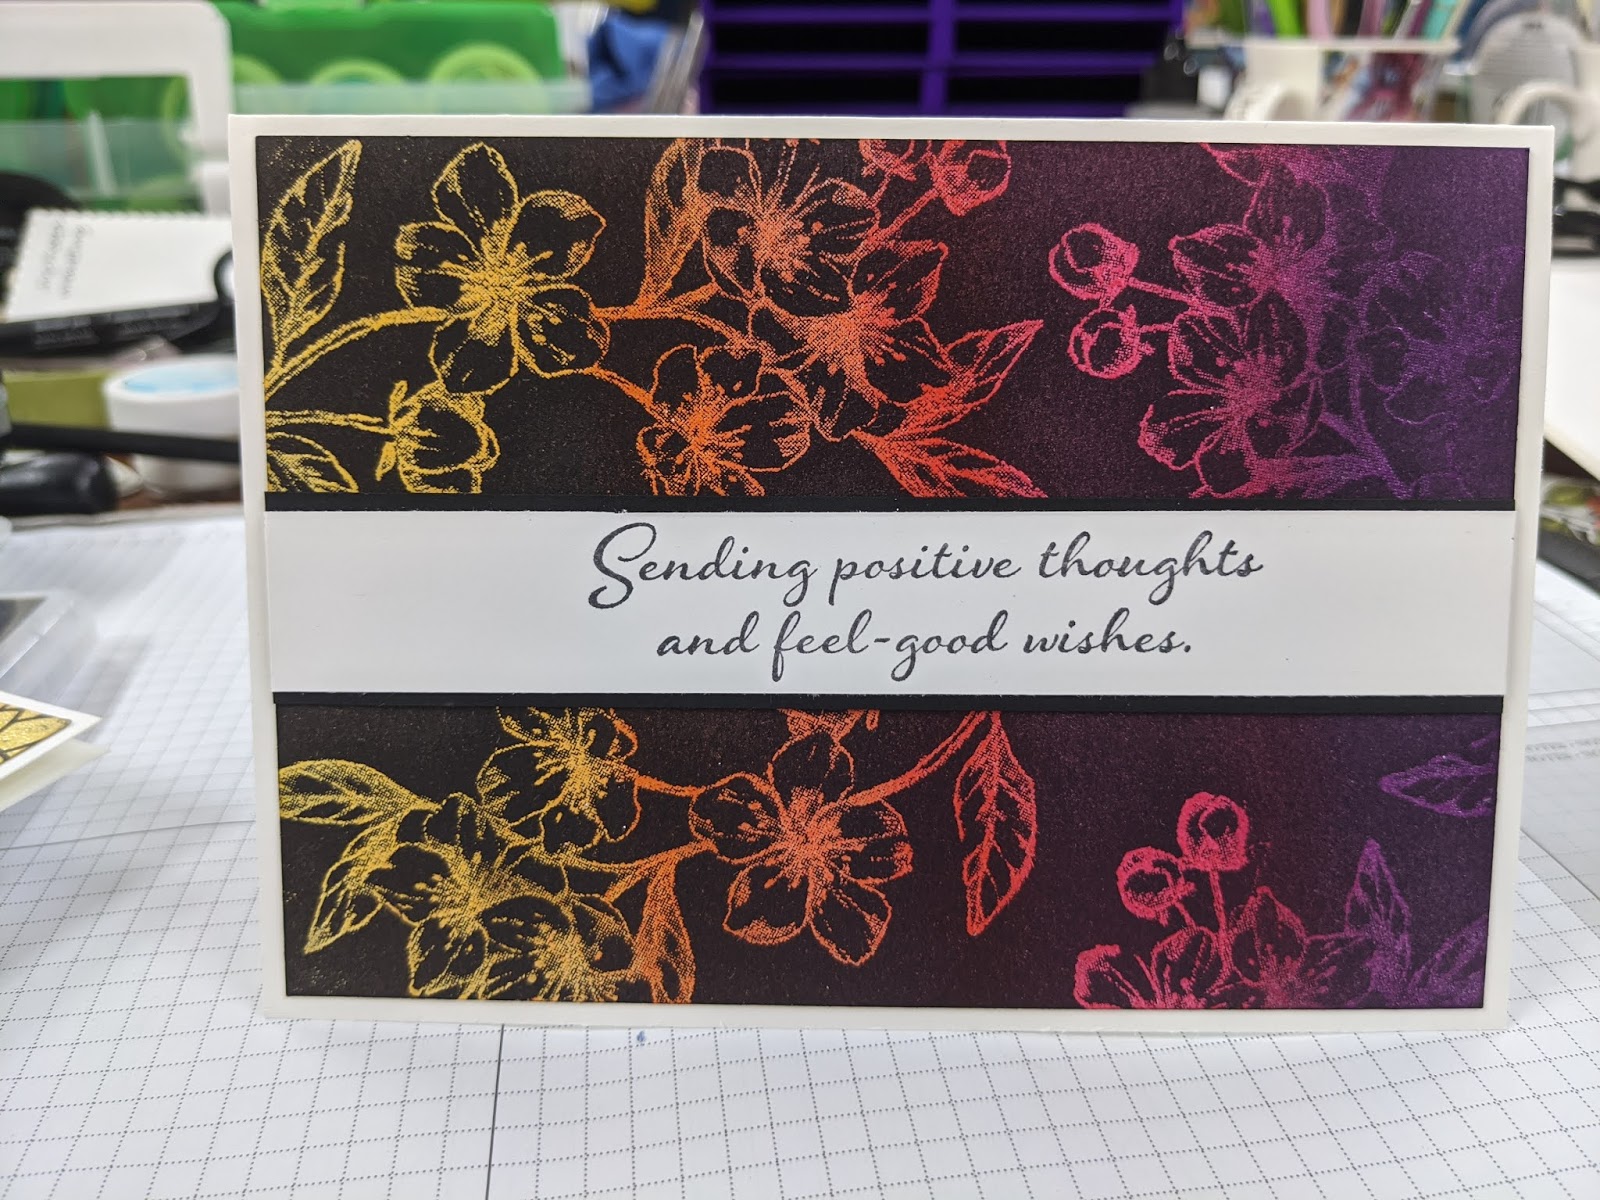
I really dont recall where the inspiration for this came from. I apologise if it is your design I copied! I highly doubt anyone will read this so likely no-one will mind or notice lol. I made this card four times. Two with Just Jade, two with Misty Moonlight. The crackle background ones have stitching down the left side and the other two dont. Flowers are from the Honey Bee set and I think (the middle fern looking foliage) is from Everything's Rosy.


This is heavily inspired by www.maryannecowan.com but I decided my DSP needed a layer of green behind it. I think this one is garden gree. Ribbon is Mint macaron. The two parts sticking out behind the ribbon (they remind me a little of wheat) are from the new sunflower stamp set.


This is what it looked like without the green behind it:


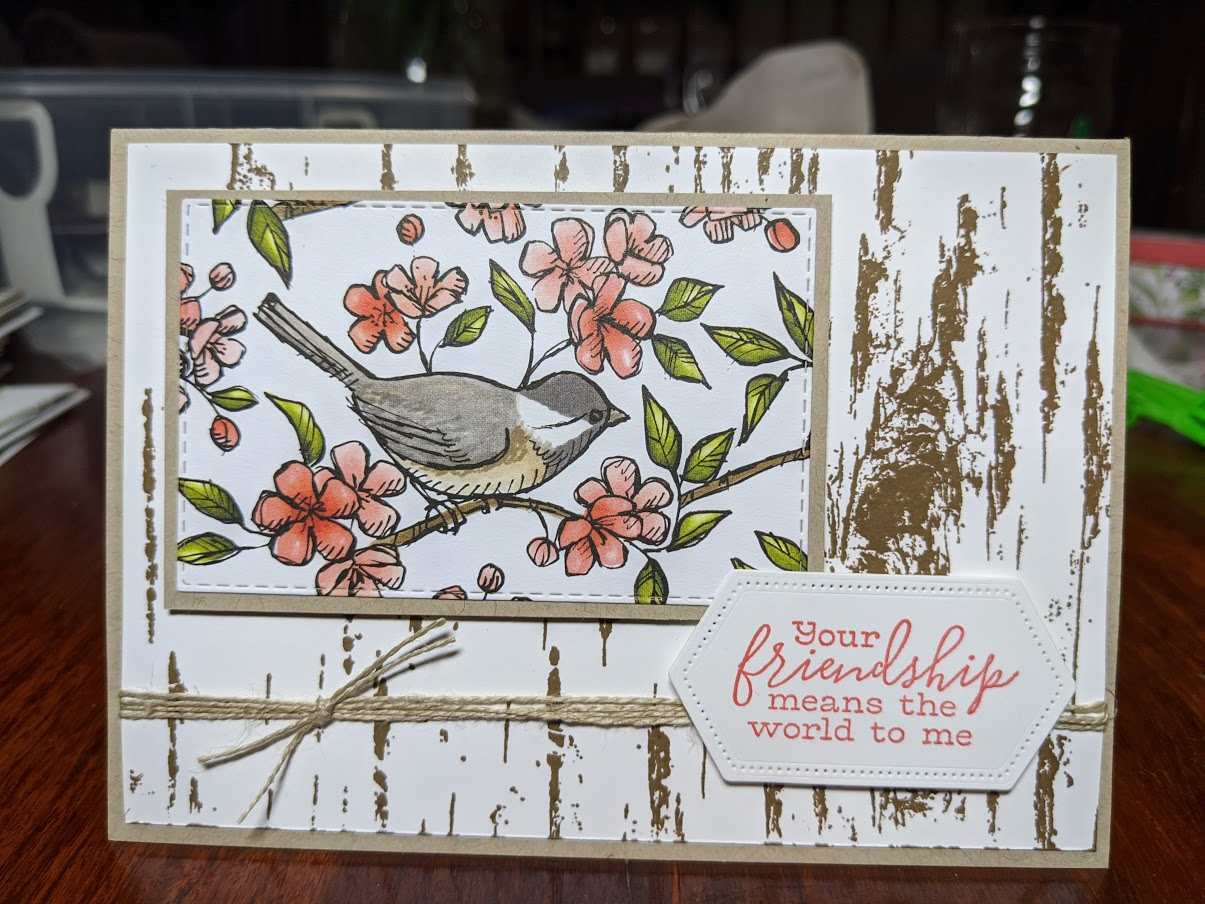
This is a pretty direct CASE of Penny O'Brien's card. I used the new old world paper folder on the back of the flowers:


Honey bee cards! These are both Mango Melody in the background. The branch is from a retired bird punch, I sponged mango melody on it until I was happy with the intensity of colour. I used the honeycomb die to cut a stencil to sponge a bit of mango melody onto the background. The second card has the oil blob from geared up garage in the background instead.


This one should be further up...I need to work on my uploading skills lol.


This is a ripping technique. You basically use one piece of DSP, cut it to the width of your card base front layer. I am in Australia so 10cm wide for us. It really needs to be a longer piece of DSP than you want, so when you rip it, you have room to flip and stick it without a gap in the middle. But I had new papers and I liked how they went together so for this example, I used two papers. The flowers are the new Jar of flowers stamp and punch. 


These two are CASEd from Lollypop Paper and Inky by Lori Pinto. I used whatever ribbon I happened to have away at the retreat with me. I thought I would be smart and not pack much ribbon...mistake!


This one was CASEd from Connie Stewart. www.simplysimplestamping.com I love the look, I think its so cute!


These two were CASEd from Chris Slogar from buckeyeinklings.com and I think I have to tell you, these are much prettier in real life!


Oh look, here are the other two that should be up the top lol.


Well I am doing better at telling you where my ideas came from but I got too lazy to reorganise the photos...I am but human and I think you'll forgive me lol.

Monday, May 4, 2020

A day of CASEing

Today I popped into my craft room and whipped up three cards. 

This first card is a CASE of a card by Chris Smith. I got a craft sheet and added 2-3 drops of each re-inkers. I chose mint macaron, peekaboo peach (retired) and petal pink. To those drops I added white re-inker so I got a more cloudy/diluted ink colour.  I applied it to a piece of white card stock using a foam brayer. Working from lightest to darkest, I used just the one roller for all. Any blotches just add to the background effect so I didnt bother with a clean roller each time, I just rolled the excess onto scrap before I rolled it in the next colour. 

Then I glued it beneath a bird ballad card base, stamped a greeting in mint macaron and die cut it with a large stiched oval die. I coloured in some flowers and die cut them and the entire panel is layered up on dimensionals, over a strip of ribbon which tied through the inside of the card.


This next card has an electrical circuit inside it so the lighthouse lights up. To get this effect, I cut a card front in white card stock.  The first thing I did was clear emboss the birds so that they would resist ink when I coloured the background. Then I used a sponge brayer to lay down pool party, bermuda bay and night of navy ink. When I was done, I used a tissue to remove the ink sitting on top of the birds

Then I cut the card front using the third from largest stitched rectangle die I had. I used an aqua painter to drop one drop of water onto my card (which I kinda regret...I didnt like the placement of it) and then used the lid to help me flick smaller droplets onto the card front for some added 'texture.'

Finally, I white embossed a birthday greeting onto some basic grey card stock and cut it with the smallest stitched rectangle I had. I used the same die to cut a crumb cake and night of navy rectangle, both of which I cut in half and glued onto the back of my coloured panel.

The background is whisper white which I used a subtle embossing folder on and the base of the card is crumb cake. The lighthouse was stamped in night of navy onto whisper white. I coloured the shadded lines with a light gray granite alcohol marker. This entire card was CASEd from kimsstampingspot.blogspot.com so go check it out!


Friday, May 1, 2020

Neglected

Well hello everyone! It has been a looong time since I updated this blog. I have finally remembered to download the app onto my current phone so let's see if I can get a bit more regular with it.

For now, I will add a few photos here. Some definitely need some CASE recognition so I will attempt to come in and add that after I do a little more research but every now and then, I delete a pin after I copy it and credit cant be given. Now that I am going to make more of an effort to blog, I will take note of who I got it from so they get the recognition they deserve. Now, onto some photos!

This card, I  cased but I don't still have the pin. I hated the green background these flowers were on, so I sat and fussy cut them all off. I think I have made about 10 copies of? I tried it on two backgrounds but cannot decide which I like better?


I looove this set, it is my current favourite! I have used it over and over, made swaps with it and made a heap of these cards with different greetings. I used the tin embossing folder (stampin' up).


I found the scraps for this laying on my table, so whipped it up quickly. Nothing special!


My friend Leah made me one of these for my birthday and I loved it so I made one for myself. I created the backgrounds with YUPO paper and alcohol inks. I actually made one in every colour of shimmer paper I had but these are the only two I havent sent out. I must get better at taking photos lol.


 I went to technique camp with my friend Odette. We go each March and we make 20 samples and cards using 20 techniques. This is white embossing then pigment sprinkles (like brushos). WIth the stamped end facing me and the non-stamped end facing away, you spritz with water. This gives an intense colour saturation at one end and a kind of streaky look at the other. It was only after I made these that I remembered we used watercolour paper and I had used white...whoops! They still worked but they were a bit warped.


I first made this card a few years ago and decided to make it again. This one is a case from stampinpretty.com


Here is another one off pinterest (lets get real, they almost always are lol). Possibly inspired by Libby Dyson...but I am not sure! I'll do better, I promise lol.


This is a dutch door fold card, and was one of the techniques we did at camp. I made about 4 or 5 of these but they were all sent to my sisters and friends. Two had biblical verses on them and this was the other style. Some CTMH paper and stamps and some SU. I am not a product snob, if it works for me, it might be any brand lol.


This pink card is CASED from Vicki Boucher, via pinterest. It is pretty much a direct copy because this card was so pretty. Butterfly placement is entirely dictated by the fact I dropped ink prints here and there...I am not a clean card maker, despite my best efforts lol. 


These were created out of necessity, I wanted some fairly flat cards to post out during COVID19 lock down and wanted my friends to know I missed them and was thinking of them. Most of these went to NZ in the mail. Again, not my design...


Ok this was my design lol. FINALLY! :P I fussy cut heaps of these birds when I was recovering from a surgeyr last November so they will be going on cards for quite some time to come lol.


I made this one at the same time. I got this stamp off a lady for like $1 and just had to use it!


My niece asked me to make these for her baby shower then never sent them so I have a heap of thank you cards now lol.


This is decidedly NOT my genre of card making! I directly copied this card and I cannot find the pin so I think this is one I deleted. Maybe I will make a "copied cards" folder in pinterest and move them there as I make them. I think that will solve my problem. I also made this with the kindness stamp from the same set.


Another of the 'flat cards' for covid that I wanted to post out. Again, not my design.


This one is a Kylie Bertucci copy. It has 6 layers of card stock on it! Each is 2mm different in size so you have to be accurate in cutting and placing! I love how this turned out.


And since I liked that, I tried a Christmas version and decided it is way too "busy" but not unuseable?


This next tevhnique, is called Joseph's Coat. I rolled on my ink with a sponge brayer until it was quite saturated like this:


Then I clear embossed stamps and then brayered black over it until the rainbow was hidden...then polished the embossing with a paper towel to remove any excess ink from them.


This meerkat pull up card, came from Laura at Laura's craft closet. I had fun making this work and enjoy learning from youtube videos so I will give you the link in case it is your preferred method of learning too!


This next card is also from Laura's craft closet. I had good fun making this card! I got my husband involved and we have changed up some products to make it even easier to make. If it works, I'll do you a video of it so you can see it in action! I made the fronts but I did one electrical circuit (this first one with three lights) and my husband did the second one, which has three lights but reliably only one turns on lol.

https://www.youtube.com/watch?v=IZysQE40_Hs&t=1088s


This next one is pinterest inspired and came out beautifully, I dont know why I photographed it so terribly, maybe because I finished it at 3am lol. I cased this from Chase and main. chaseandmain.com 


These four were made using scraps left over on my desk from previous cards. I quite like them! In each instance,  I used a few drops of re-inker, mixed with about a teaspoon of waster (you could do less water  or more drops if you wanted more intense colour) and painted it onto the background using an aqua painter. On top of that, I layered the laser cut pieces for some pattern. These are retiring so perhaps using dies to cut your own version would work? The Eiffel towers were covered in glossy accents BUT they were really fiddly so I just swiped a thin layer on with my finger and tried to get it out of the holes with a piercing tool. Rudimentary but effective!


Ok, I feel like that's enough cards for one night! Hope you enjoyed and feel inspired!